The Channels dialog is opened from the Dialog menu or from the context menu on the Channels or Responses listbox. In the Time Response module, SRS module, and SPL module, the Channels dialog is used for enabling and disabling channels. In the Spectra module, the Channels Dialog is used for enabling and disabling responses but not references. The Channels dialog is not available in the MIFs module.
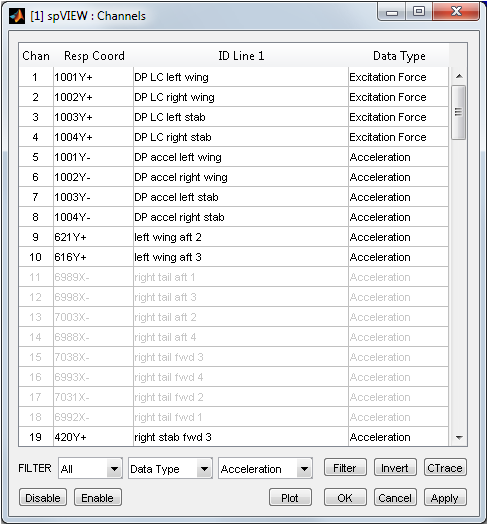
The channels or responses are listed in the table by their Channel or Index, Response Coordinate, ID Line 1, and Data Type. The Channel (Time Response module, SRS module, and SPL module) does not necessarily correspond to the data acquisition system channel number, but is actually the record in the file or index of the imat_fn. The Index (Spectra module) corresponds to the row of the frequency-domain function matrices.
Clicking on a column header sorts the table by that attribute. The rows of the table can be selected with the mouse. The Invert button inverts the current selection of rows. Clicking in the table and pressing Ctrl+A selects all rows. The Disable button disables the selected channels or responses, and the Enable button enables the selected channels or responses. The disabled channels or responses are displayed as gray text in the table and the enabled channels or responses as black text. The Apply button will apply the current sieve of enabled and disabled channels or responses. The Cancel button will close the dialog without applying the sieve. The OK button will apply the current sieve and close the dialog. The Plot button will plot the selected channels or responses.
The channels or responses in the table can be filtered by several attributes: Channel or Index, Response Coordinate (node number and direction), Response Node, Response Direction, ID Line 1 (text description), Data Type or Coordinate Trace. For Channel, Index and Response Node, enter a numeric value in the edit box. The MATLAB array notation (e.g., 1:100) is supported, with an exception that the increment notation (e.g., 1:2:100) is not supported for Response Node. For Response Coordinate and ID Line1, enter a text string in the edit box. The asterisk ("*") wildcard character is supported. For Response Direction, Data Type, and Coordinate Trace, select from the popup list menu.
The filter can operate on All table rows or on the table rows that are Selected (highlighted), Enabled (enabled channels or responses), or Disabled (disabled channels or responses). To filter the channels or responses: (1) select the type of table rows on which to filter (i.e.,All, Selected, Enabled, or Disabled); (2) select the filter attribute; (3) enter or select the value for the attribute; and (4) push the Filter button. Those channels or responses meeting the filter criteria are selected, and then those channels or responses can be enabled or disabled.
The Coordinate Traces available for the Channel dialog filter are those that were loaded into spVIEW from a Universal file or from the MATLAB workspace. New coordinate traces can also be created from the current channels or responses sieve (i.e., those channels or responses that are enabled) with the CTrace button. An input dialog is presented to enter a name for the created coordinate trace. The created coordinate trace is appended to any existing coordinate traces. The coordinate traces can be saved to a Universal file or the MATLAB workspace from the File menu.